0. Setup
Install software
Install R and RStudio
Please follow these instructions to install R and RStudio.
On macOS, the quickest way to install R and RStudio without manually downloading those, clicking and dragging, is to use the Homebrew package manager in the Terminal.app:
brew install --cask r
brew install --cask rstudio
Install Quarto
You do not actually have to install Quarto for this workshop or if you only use it inside RStudio, as it comes bundled with RStudio since v2022.07. However, if at any point you will feel like you want a separate Quarto installation (e.g. you may want to manually run it outside of RStudio), you can do so here. The quarto R package is also completely optional (as it is just a wrapper around the Quarto command line tool), and can be installed with install.packages("quarto") in RStudio.
Install git
The best way to install git (and other software) on macOS is to use Homebrew package manager. Since you are already somewhat comfortable with R, and you are about to learn git, you will have to get comfortable with terminal commands anyway, as this is inevitable in the long term.
This may seem like a hassle, compared to Windows, but in the long run it will save you a lot of time after this one-time setup. You can follow the video here to guide you through the process, or the text instructions below.
Install Homebrew
Open details
Open the Terminal.app on your mac.
Go to the Homebrew website https://brew.sh/.
Copy whichever command they will have on the website under the “Install Homebrew” heading. This is one of the few occasions where you can trust the command you copy from a website to run in the Terminal. Running random commands from the internet is not safe. Always make sure you trust the website or person that is asking you to run any command in the Terminal.
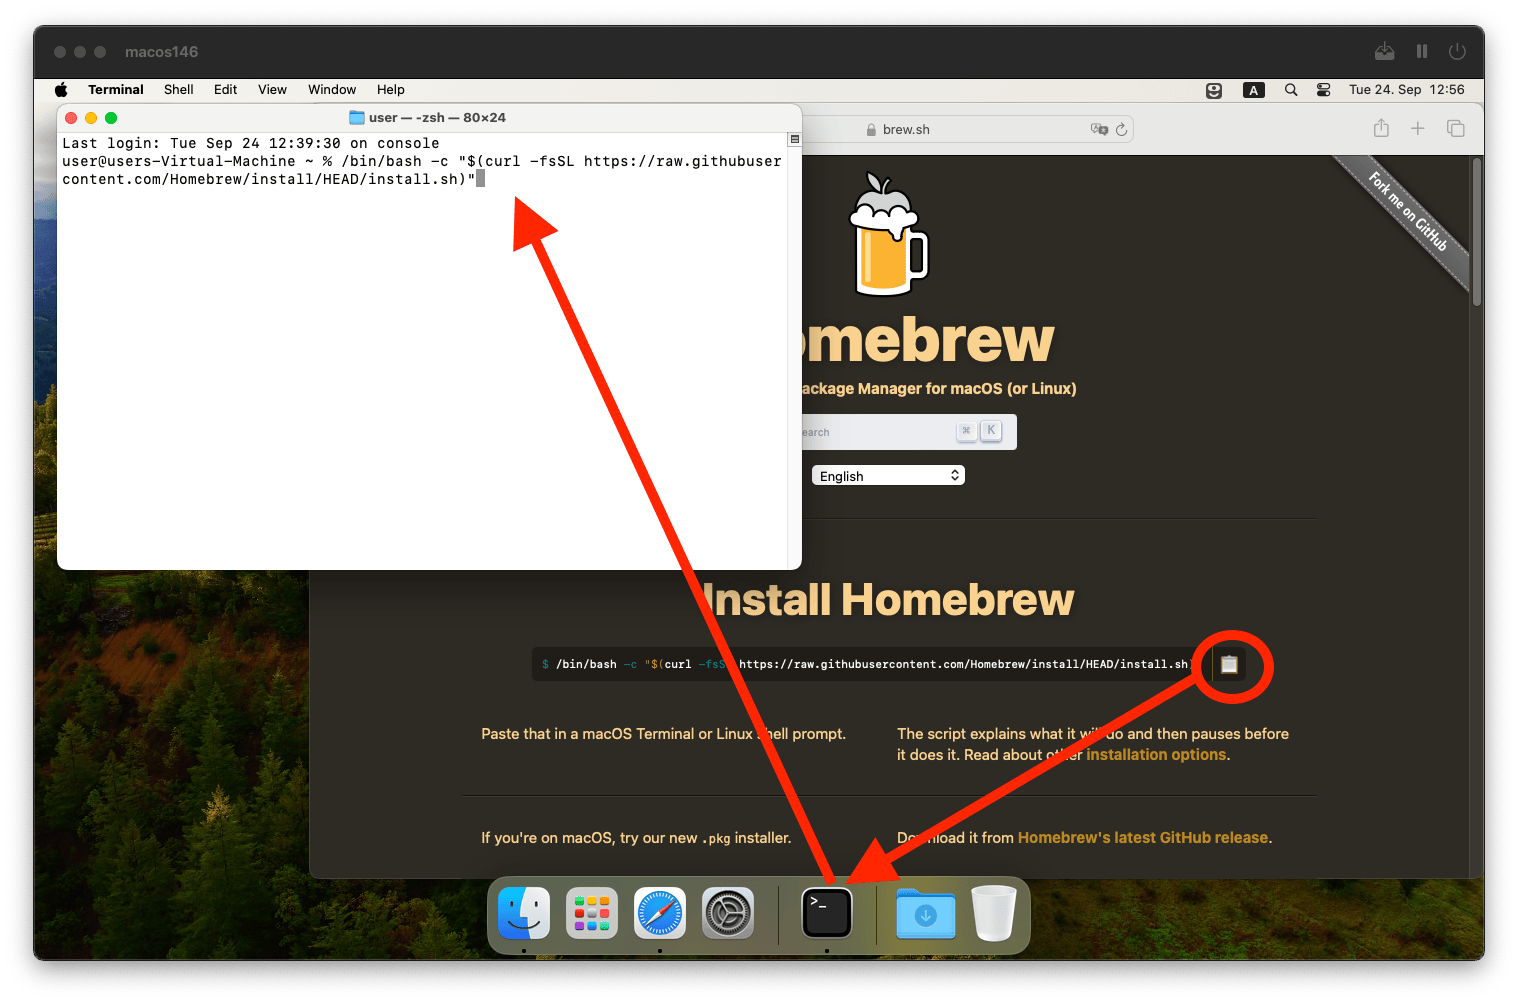
Press
Enterand confirm with your password (in Terminal you do not see that you are typing your password, but actually you are). Same as above, make sure you trust whomever is telling you to confirm any terminal command with your password. Confirm again withEnterthe installation of command line tools.Wait for about 5 minutes.
When the installation is complete, you should see the following:
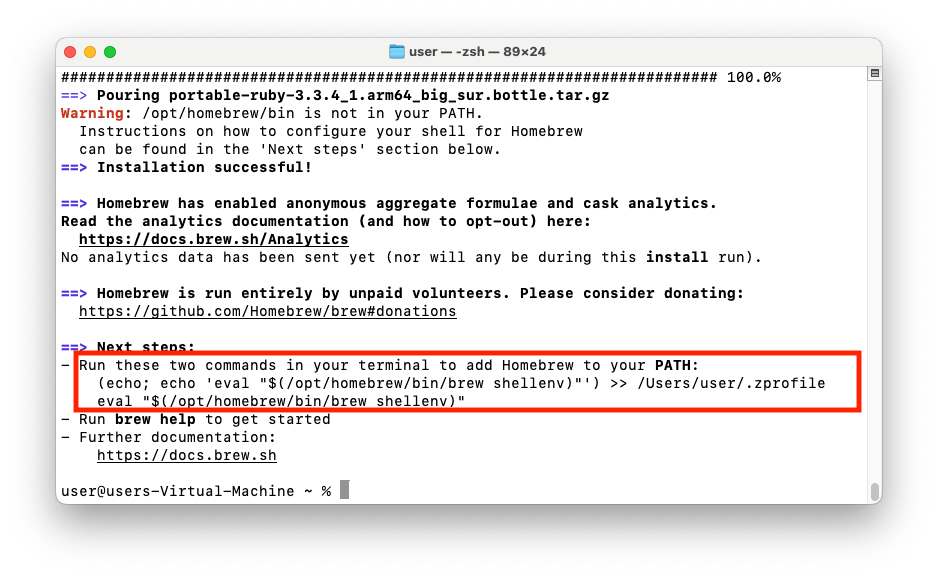
Homebrew is installed, follow the post-installation instructions by running the two commands you see in teh end of the output To finilise the process, follow the post-installation instructions by running the two commands you see in the end of the output. The first command is unique to you, because it includes your username. However, you can also use these parametrised username-agnostic commands below (
$(whoami)will be converted to your username when you run it):- This adds
Homebrewto your terminal profile, so that thebrewcommand is always available:
(echo; echo 'eval "$(/opt/homebrew/bin/brew shellenv)"') >> /Users/$(whoami)/.zprofile- This does the same as above, but for the currently open terminal window, so that you do not have to restart it:
eval "$(/opt/homebrew/bin/brew shellenv)"- This adds
Now you can install any software using commands in the terminal.
Install git
Once Homebrew is installed, open the Terminal.app on your mac and run the following command to install git:
brew install gitAlso, for easier authentication, install the Git Credential Manager (GCM) using:
brew install --cask git-credential-managerGet git installer here and feel free to follow any of the multiple youtube videos on how to install git on Windows if you are stuck. This video is a good one. I recommend the choices that the author of the video selects during the installation. Among those choices, one of the most important one is to install the Git Credential Manager (GCM), which will allow you to authenticate with GitHub more easily.
If you are on Linux, you probably know what you are doing. Just find your Linux distribution on this list and follow the instructions there. You may also find this video helpful.
Overall the process is extremely simple, e.g. on Ubuntu you just run this in the terminal:
apt-get install gitCreate a GitHub account
Follow the official instructions here to create a GitHub account. In practice, this is no different from creating an account on any other website. To protect your GitHub account, consider using two-factor authentication
Authenticate in git with GitHub account
The git terminal command to manage your project repository can be used locally and does not require GitHub, but if you want to upload your project to GitHub, you will need to authenticate with GitHub. The easiest way to do that is using the Git Credential Manager (GCM). You should have installed it in the steps above.
If you are confident with command line, you may opt for a hard way to set up git authentication using ssh keys. The landing page for the official set of tutorials is here. Authentication with ssh keys is recommended for advanced users who need some more flexibility compared to GCM, but for this tutorial GCM is sufficient.