flowchart TB
  A[User passes GitHub repository URL to mybinder.org]
  A --> Z[BinderHub starts a cloud server with Docker software]
  Z --> B[BinderHub downloads files from given repository to create a Docker image]
  B --> C{Docker image already in temp storage?}
  C -- Yes --> D[BinderHub pulls Docker image from temp storage]
  C -- No --> E[BinderHub Builds Docker image]
  E --> F[BinderHub pushes Docker image to temp storage]
  F --> D
  D --> G[BinderHub runs the Docker image]
  G --> H[User gets access to the running image in a web browser]
Get Familiar with Docker and Binder
The goal of this tutorial is to show you how to create a reproducible GitHub repository that can be run in Binder. This is a great way to share your code with others, as they can run your code in the cloud using just their web browser without having to install anything on their local machine. There are some limitations, such operating memory limit of 1-2 GB and temporary nature of such environment, but for most small to medium-sized projects and for someone to just quickly inspect your code, this should be sufficient.
Real world examples
Below you can find real-world examples of such repositories that accompany scientific papers:
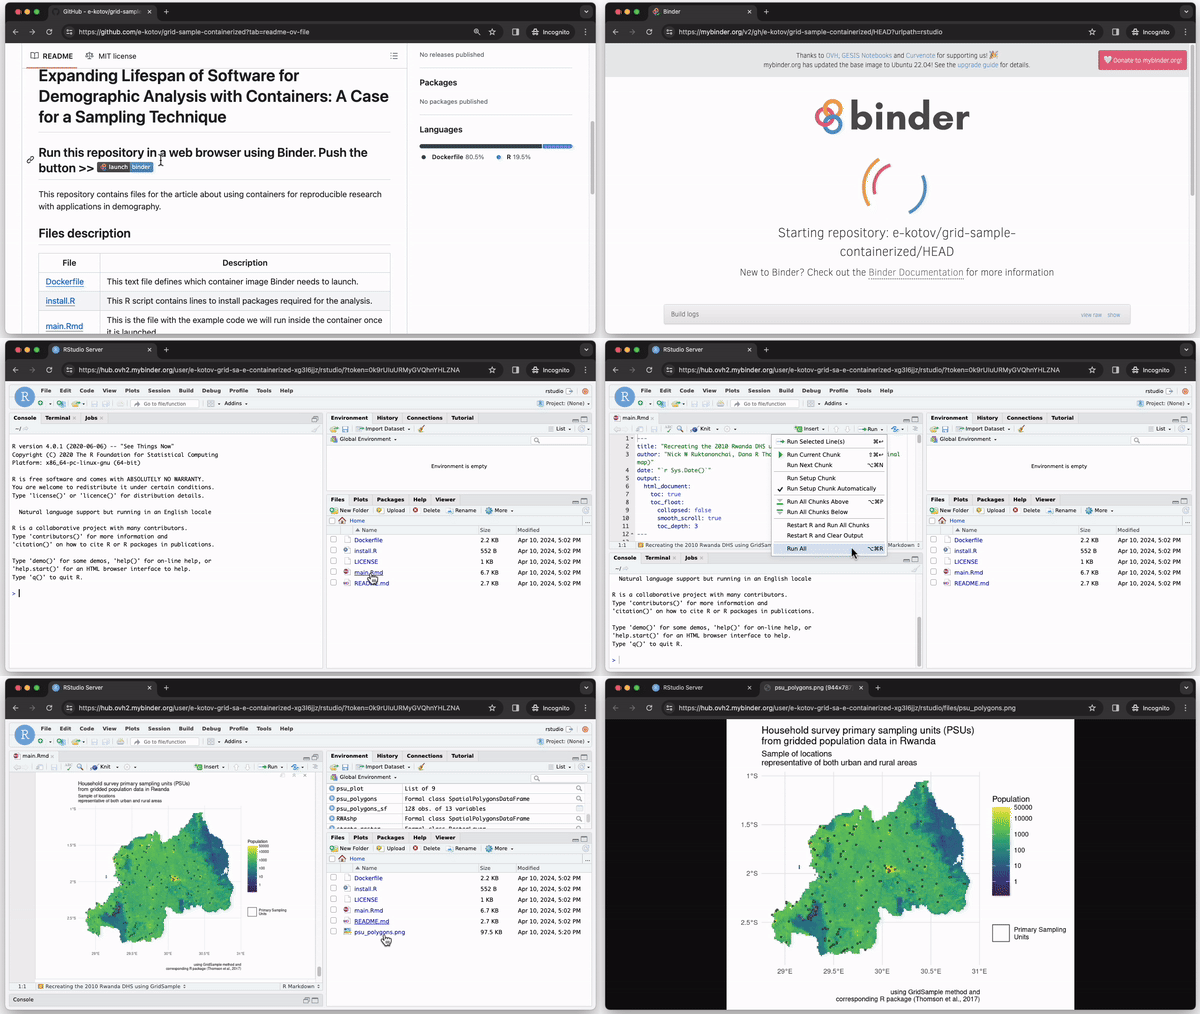
There is also a minimal example (Kotov and Deneke 2024) that you can see in action below. Mind you, that the video is sped up, and in reality, it may takes a few minutes to start the container.

Try the example repository live-demo
Go to this example repository. Try to run the contents of the repository in a container in the cloud using Binder by clicking on the badge that looks like this: .
When you do so, you will be presented with an RStudio interface in your web browser. The actual RStudio and R will be running in a container on a server provided by one of the participants of the The BinderHub Federation.
How does this magic happen?
Explore how containers work
If you look inside the example repository, you will see that it contains a Dockerfile and a few other essential files to create and run a container with RStudio. Here’s a breakdown of what each file does and how you can change them to set up your container.
Dockerfile
Dockerfile defines how your container is created. It is an instruction set that container building software, such as Docker, uses to create a container image. It is similar to how you can type commands in the terminal to install software on your computer, but in this case, you are installing software inside a container and the syntax of a Dockerfile is a bit different, as it prefixes each command with a keyword such as FROM, COPY, RUN, etc. You can find more details in the Docker documentation.
- First we tell the container software to use the
rocker/binder:4.0.0container image as a base. This is a container image that someone has already created and shared with the community. In this case it’s created by the Rocker Project. It already has Linux operating system, R, RStudio and many R packages installed.
FROM rocker/binder:4.0.0If you were building your own highly specialised container, you would probably start with a more basic container image, such as ubuntu:20.04 or debian:bullseye, and then install all the software you need from scratch. This is more work, but it gives you more control over what is installed in the container.
- Next we copy all the files from the repository into the container. This is done with the
COPYcommand. This way, when the container is started, all the files from the repository are available inside the container.
COPY --chown=${NB_USER} . ${HOME}If you were to build a container not for the GitHub repository and Binder, but for use in the high-performance computing cluster or on your own computer, you would probably want to copy only the essential files and not the whole repository. You would also not include the data or the analysis code, but would only include configuration files that define which software should be inside the container.
- The last line of the
Dockerfileis theRUNcommand that installs R packages that are not part of the Rocker container image. You can find out empirically which packages are missing by trying to run your code in the container and seeing which packages are missing. Or you can read the source code of the container creation script (e.g. for Rocker Verse, Rocker Tidyverse, or Rocker Geospatial) and see which packages are pre-installed there.
RUN if [ -f install.R ]; then R --quiet -f install.R; fiinstall.R
install.R file contains the R code that installs the GridSample package. This package is not included in the Rocker container image, so we need to install it manually. In this case, a very specific version of the package is installed, because this specific version had a certain bug fixed.
remotes::install_github("nrukt00vt/gridsample@03c2d10134cbf94dc8c7452c3a5967c8624e260a", force = TRUE, dependencies = TRUE)However, this install.R file can contain any R code. You can install packages in all the usual ways, for example:
To install from CRAN:
install.packages("ggplot2")To install a certain package version from CRAN or install versions of packages that were archived on CRAN (by default, installs the latest available version, even if the package is archived):
remotes:install_version("MortalitySmooth")To install any package from GitHub:
remotes::install_github("MPIDR/rsocsim")